
Gmail Filters
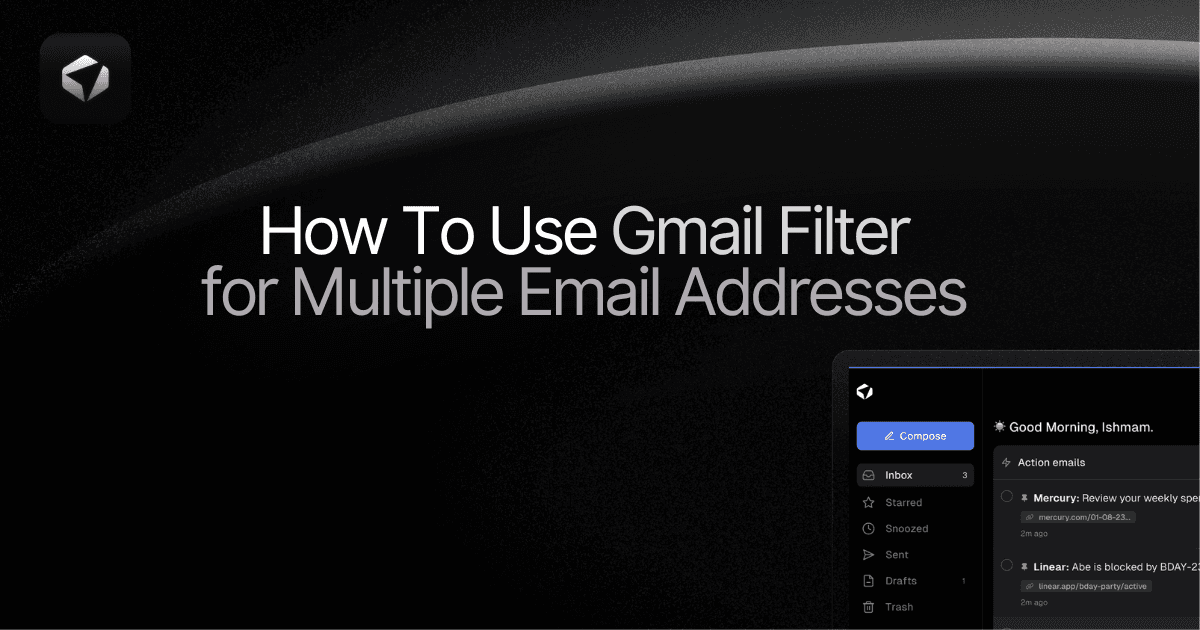
How To Use Gmail Filter for Multiple Email Addresses (+ AI Email Filtering Tool)
January 27th, 2024
Are you tired of sorting through a cluttered mailbox with multiple email addresses? Do you find yourself missing important messages because they get lost in the chaos? Well, fret no more! In this blog post, we will explore the wonders of using a Gmail filter for multiple email addresses, a game-changing solution that will revolutionize the way you manage your inbox.
Imagine a world where all your emails are neatly organized and easily accessible. With a Gmail filter for multiple email addresses, this dream can become a reality. Whether you have a personal email, a work email, or multiple business accounts, this powerful tool allows you to streamline your inbox and stay on top of your messages. Say goodbye to the frustration of searching through a sea of emails and hello to a more organized and efficient email experience.
We will guide you through the process of setting up a Gmail filter for multiple email addresses, step by step. We will also share some expert tips and tricks to maximize the effectiveness of your filters. So if you're ready to take control of your inbox and reclaim your sanity, keep reading. By the end of this post, you'll be a Gmail filter pro, wondering how you ever lived without it. Plus, we'll answer a burning question you may have: "How do I empty my mailbox?" Let's dive in!
Table of Contents
Complete Step-by-Step Guide On How To Use Ultra's AI Email Filtering Feature
Take Control of Your Email Inbox With Ultra — Get To Inbox Zero Daily
Does Gmail Filter Multiple Email Addresses At Once?

Managing multiple email addresses can be a challenging task. Fortunately, Gmail offers a robust email filtering system that can help streamline your inbox and keep you organized. We will explore whether Gmail can filter multiple email addresses at once and how to leverage this powerful feature to enhance your email management.
Yes, Gmail has the capability to filter multiple email addresses at once using its advanced filtering options. With Gmail filters, you can apply specific actions to incoming emails based on various criteria, including sender email addresses. This means you can create filters that will automatically sort and organize emails from multiple email addresses into separate folders, apply labels, mark as important, or even forward to another account.
Creating Gmail Filters for Multiple Email Addresses
To create a filter for multiple email addresses, follow these simple steps:
Open Gmail and click on the gear icon in the top right corner to access the settings menu.
Select "See all settings" from the drop-down menu.
Go to the "Filters and Blocked Addresses" tab.
Click on the "Create a new filter" button.
In the "From" field, enter the email addresses you want to filter, separated by commas.
Customize the filter criteria as per your preference, such as specific words in the subject or body, and choose the desired actions to take when the filter matches.
Click on the "Create filter" button to save your filter.
Managing Multiple Email Addresses with Gmail Filters
Once you have created filters for multiple email addresses, Gmail will automatically apply them to incoming emails according to the specified criteria. Here are some practical ways you can leverage Gmail filters to manage multiple email addresses effectively:
1. Organize Emails
Create filters to sort emails from different email addresses into separate folders or labels. This ensures that each email address has its own dedicated space, allowing you to focus on relevant messages without getting overwhelmed.
2. Set Priorities
Use filters to mark emails from important email addresses as "important" or "priority" so that they stand out in your inbox. This helps you prioritize your attention and ensures that you don't miss any critical communications.
3. Categorize Correspondence
Create filters to automatically apply specific labels to emails from different email addresses. This categorization makes it easier to find and manage related emails, such as work-related correspondence, personal emails, or newsletters.
4. Forward Emails
If you prefer consolidating your emails into a single inbox, you can create filters to forward emails from multiple email addresses to a primary account. This eliminates the need to switch between multiple accounts and allows you to access all your emails in one place.
Gmail's email filtering system is a powerful tool that can greatly simplify the management of multiple email addresses. By creating filters for different email addresses, you can automate the organization, prioritization, and categorization of your incoming emails. Take advantage of this feature to streamline your email workflow and regain control over your inbox.
Related Reading
• Email Filters Gmail
• Spam Filter Iphone Email
• Gmail Date Filter
• Gmail Filter Syntax
• How To Remove Filter In Gmail
• Gmail Apply Filter Retroactively
How To Use Gmail Filter for Multiple Email Addresses

Gmail is an incredibly powerful and versatile email service, and one of its most useful features is the ability to create filters. Filters allow you to automatically organize and prioritize your incoming emails, ensuring that your inbox remains clutter-free and that you don't miss any important messages.
In this section, let’s through the process of using the Gmail filter to filter for multiple email addresses within one filter. I will provide a step-by-step example using random company domains to demonstrate how you can effectively manage emails from various sources.
Step 1: Open Gmail Settings
To begin, open your Gmail account and click on the gear icon in the top-right corner of the screen. From the dropdown menu, select "Settings."
Step 2: Navigate to the Filters and Blocked Addresses Tab
Once in the Settings menu, click on the "Filters and Blocked Addresses" tab. This is where you can create and manage your filters.
Step 3: Create a New Filter
To create a new filter, scroll down to the bottom of the page and click on the "Create a new filter" link.
Step 4: Specify the Email Addresses
In the "From" field, enter the email addresses that you want to filter. You can enter multiple email addresses by separating them with the "|" symbol. For example, if you want to filter emails from randomcompany1.com and randomcompany2.com, you would enter "randomcompany1.com|randomcompany2.com" in the "From" field.
Step 5: Define the Filter Criteria
Next, you need to define the criteria for the filter. You can choose to filter emails based on various factors such as the subject, keywords in the body, attachments, and more. For this example, let's say we want to filter emails from these domains into a specific label called "Random Companies".
In the "Has the words" field, enter any specific keywords or phrases that you want to filter. For instance, if you want to filter emails with the subject line containing the word "offer" or "opportunity", you would enter "offer|opportunity" in this field.
Step 6: Set the Action
Now it's time to set the action for the filter. You can choose to automatically apply a label, mark the email as important, prioritize it, or even forward it to another email address. In this section, we want to apply the label "Random Companies" to these emails. Select the checkbox next to "Apply the label" and choose "Random Companies" from the dropdown menu.
Step 7: Create the Filter
Finally, click on the "Create filter" button to save your filter. Gmail will now automatically filter any emails from the specified email addresses that match the defined criteria and apply the "Random Companies" label to them.
Step 8: Manage Your Filter
You can always go back and edit or delete your filter by accessing the "Filters and Blocked Addresses" tab in the Gmail Settings. This allows you to refine your filter settings or make changes as needed.
By following these steps, you can easily set up a Gmail filter to filter for multiple email addresses within one filter. This will help you stay organized and ensure that important emails from various sources are easily accessible and prioritized.
The power of Gmail filters lies in their flexibility and customizability. You can create filters based on various criteria, such as sender, subject, keywords, and more. Experiment with different filter settings to find what works best for you and streamline your email management process. Now that you have learned how to use the Gmail filter to filter for multiple email addresses, you can take control of your inbox and spend less time sorting through irrelevant emails.
Complete Step-by-Step Guide On How To Use Ultra's AI Email Filtering Feature
Watch this guide to learn how to use Ultra to empty your mailbox in minutes, today!
Chat with your email inbox like ChatGPT, get a daily to-do list based on your inbox, and much more.
Try Ultra for free today and discover a whole new way to manage your emails with AI. Save time, never miss important emails again, and unleash the full potential of your inbox with Ultra.
Related Reading
• Best Email Spam Filter
• How To Filter Unread Emails In Gmail
• Gmail Filter Move To Folder
• Gmail Filter Wildcard
• Gmail Filter Multiple Email Addresses
• Gmail Disable Spam Filter
• Gmail Filter Has The Words
• Gmail Filter Email To Folder
• Gmail Filter Subject Contains Words
• Gmail Filter Older Than
• Gmail Filter Regex
• Gmail Filter Delete After X Days
• Gmail Filter Multiple Senders
• Gmail Filter Calendar Invites
• Reset Gmail Spam Filter
• Gmail Create Filter To Forward Email
• Gmail Filter Apply Multiple Labels
• How To Filter Large Emails In Gmail
• Gmail Filter Not From Domain
How Do I Filter More Than 50 Emails In Gmail?

Managing a large number of emails can be overwhelming, especially when you have multiple email addresses. Thankfully, Gmail provides a powerful filtering feature that allows you to organize and prioritize your emails effectively. In this section, let’s walk you through the steps to filter more than 50 emails in Gmail, helping you optimize your email management and improve productivity.
Understanding Gmail Filters
Before we dive into the step-by-step process, let's first understand what Gmail filters are and how they work. Gmail filters are rules that you can set up to automatically manage incoming emails based on specific criteria. These criteria can include the sender, subject, keywords, attachments, and more. By creating filters, you can instruct Gmail to perform certain actions on your emails, such as labeling, archiving, marking as read, forwarding, and deleting.
Creating a Gmail Filter
To filter more than 50 emails in Gmail, follow these simple steps:
Open Gmail and log in to your account.
Click on the gear icon in the top right corner of the Gmail interface, then select "See all settings" from the dropdown menu.
Go to the "Filters and Blocked Addresses" tab.
Scroll down to the bottom of the page and click on the "Create a new filter" link.
Setting the Filter Criteria
Now that you're in the filter creation window, you need to define the criteria for your filter. Here's how:
Choose the criteria that match the emails you want to filter. You can select from various options like sender, subject, keywords, attachments, and more. For example, if you want to filter all emails from a particular sender, enter their email address in the "From" field.
To specify multiple email addresses, separate them with the OR operator. For instance, if you want to filter emails from two senders, enter their email addresses in the "From" field separated by OR, like this: sender1@gmail.com OR sender2@gmail.com.
Defining the Filter Action
Once you have set the criteria, it's time to define the action that Gmail should take on the filtered emails. Here's what you need to do:
After setting the criteria, click on the "Create filter" button.
Choose the action you want Gmail to perform on the filtered emails. This may include labeling, archiving, marking as read, forwarding, or deleting.
If you choose to apply a label, select an existing label or create a new one.
Click on the "Create filter" button to save your filter settings.
Managing Filtered Emails
Once you have created a filter, Gmail will automatically apply it to incoming emails that match the defined criteria. Here are a few tips to help you manage your filtered emails effectively:
Regularly check your labeled folders to stay organized and ensure you don't miss any important emails.
Review and modify your filters as needed to adapt to changing circumstances.
Use the search bar in Gmail to find specific filtered emails quickly.
If you no longer need a filter, you can delete it by going to the "Filters and Blocked Addresses" tab in Gmail settings.
By following these steps and implementing effective filters, you can efficiently manage more than 50 emails in Gmail. Take control of your inbox, stay organized, and boost your productivity with Gmail's powerful filtering capabilities.
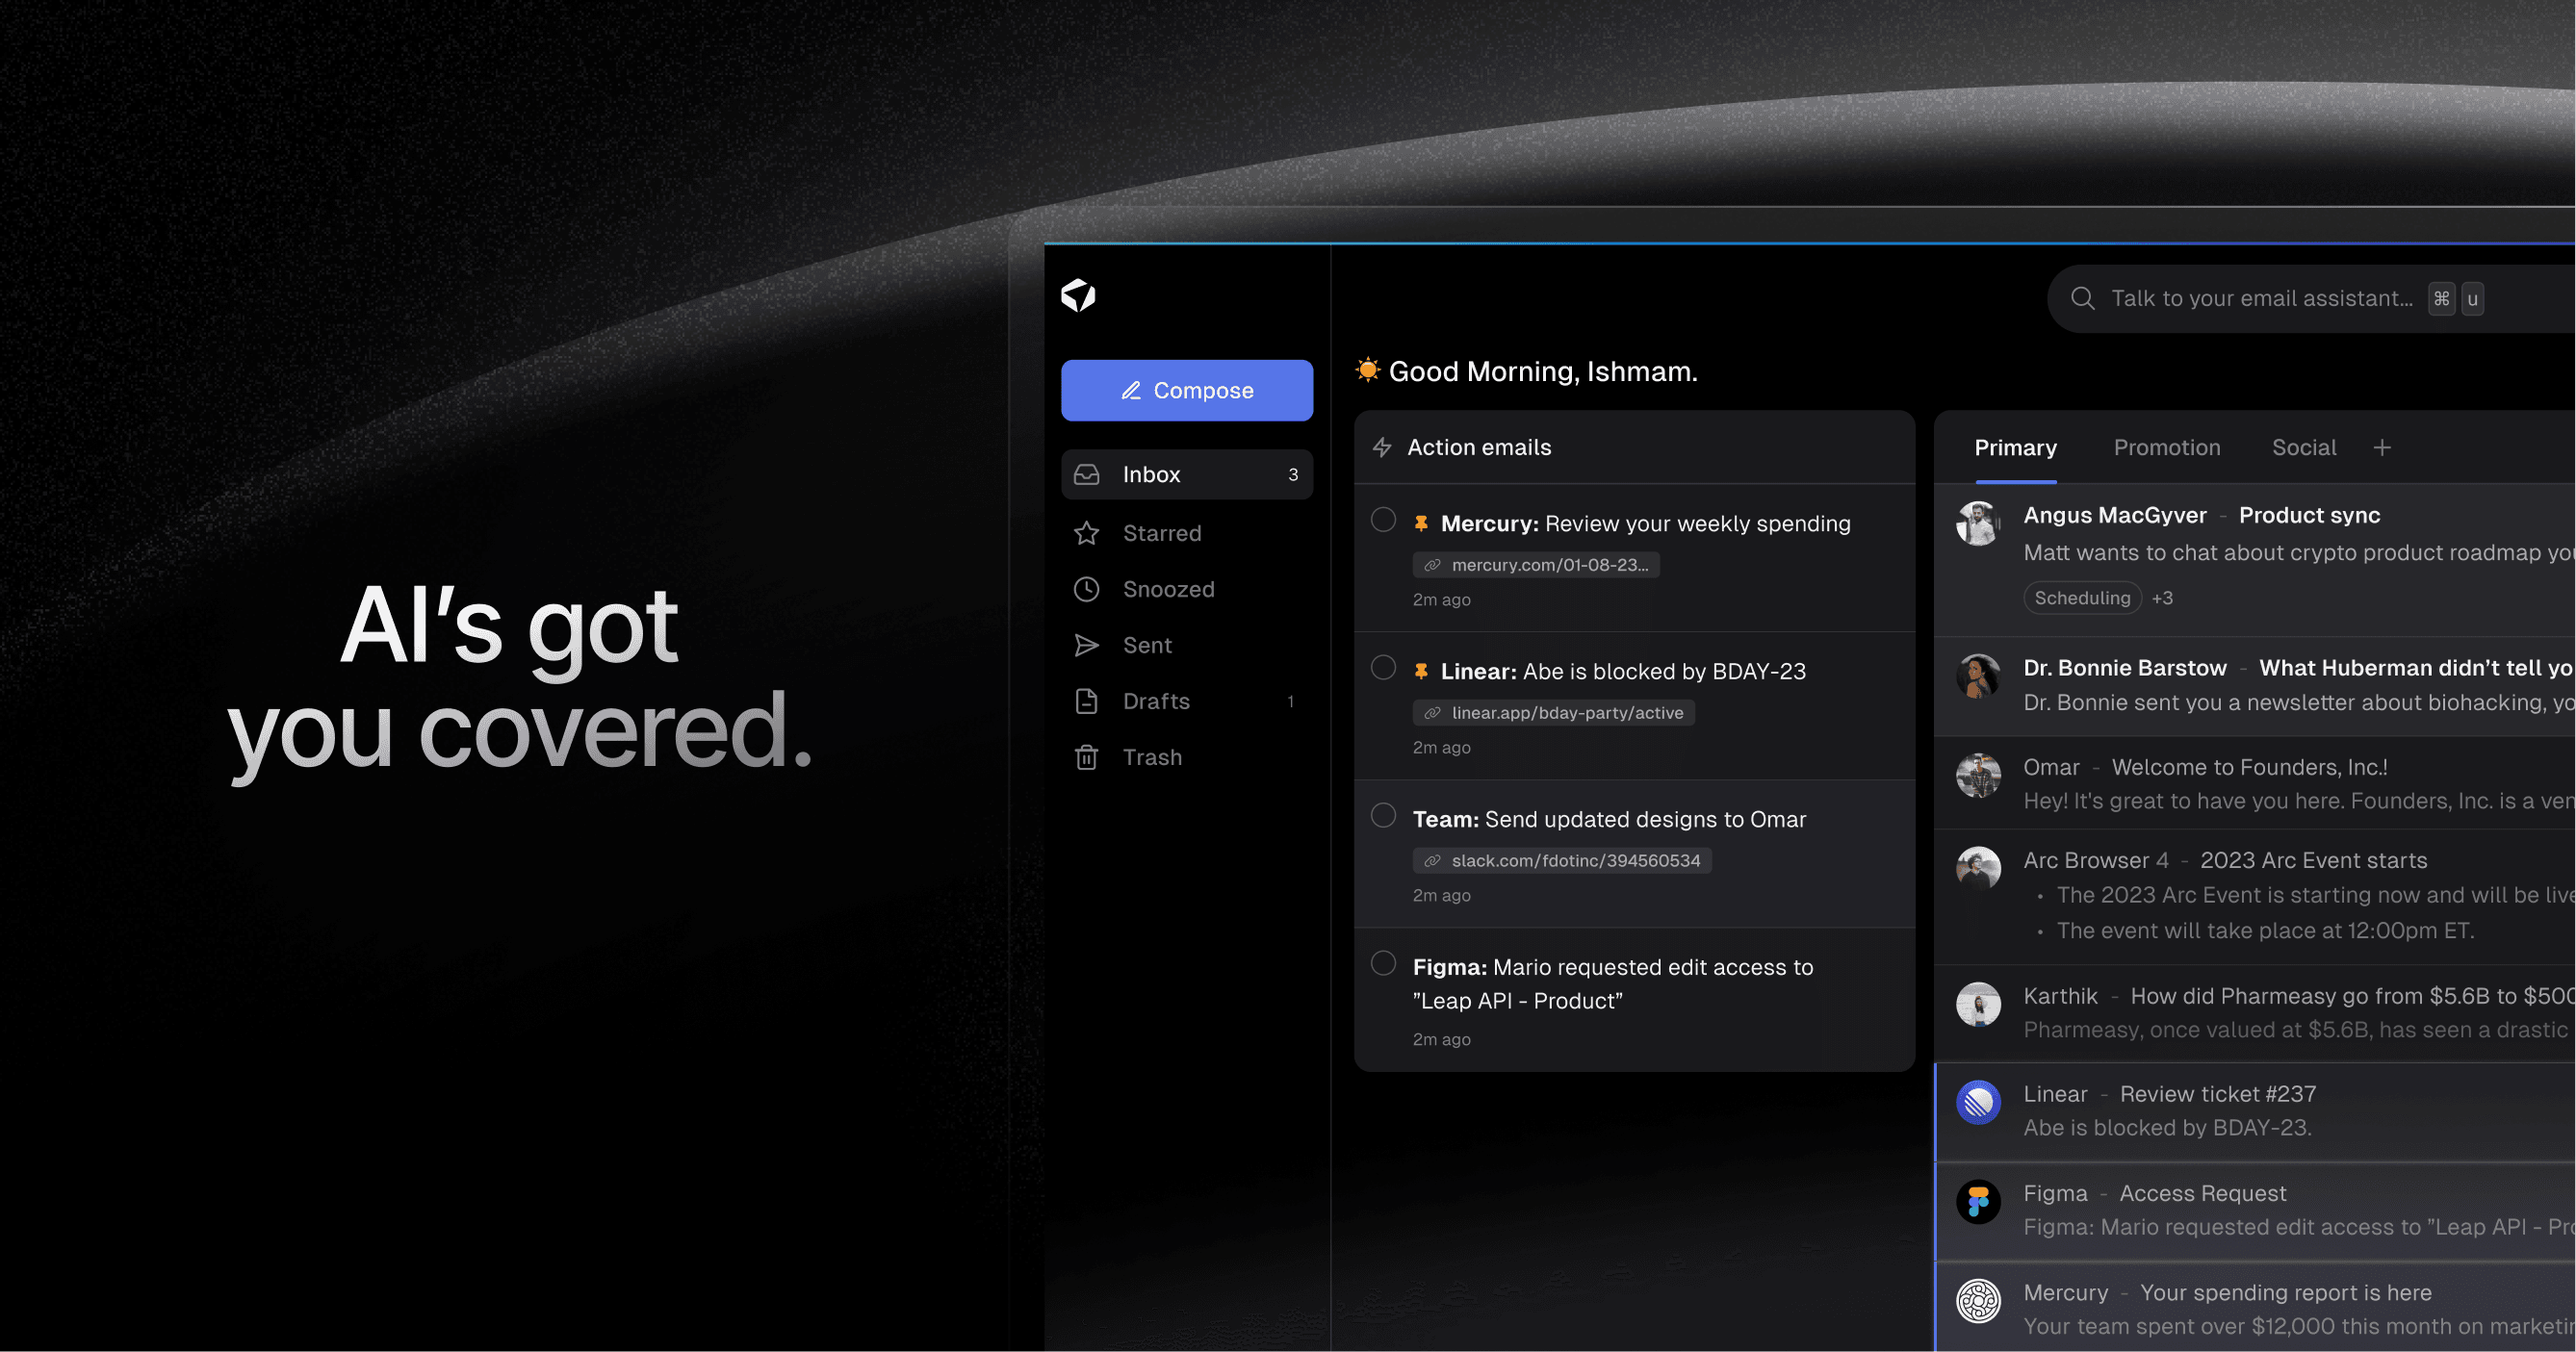
Take Control of Your Email Inbox With Ultra — Get To Inbox Zero Daily
We are constantly bombarded with emails, making it challenging to stay organized and focused. Long email threads can hide important action items and information, while spam outreach emails flood our inboxes, wasting our valuable time. What if there was a way to transform your email experience, making it more efficient and productive? Ultra, the AI-powered solution designed to crush your inbox, find what you need, and help you do more in less time.
Auto-Generating AI Todo's for Ultimate Efficiency
One of the most exciting features of Ultra is its ability to auto-generate AI todo's based on your emails and calendar. Instead of manually sifting through your inbox and creating to-do lists, Ultra's AI takes care of it for you. By intelligently analyzing the content of your emails and your calendar events, Ultra identifies actionable tasks and creates a comprehensive to-do list. Now, you can effortlessly prioritize your day and stay on top of your commitments without the hassle of manual organization.
Chat with Your Inbox, Powered by AI
Imagine having an email assistant that feels like a seamless conversation. With Ultra, you can chat with your inbox as if it were ChatGPT, a cutting-edge AI-powered chatbot. Instead of scrolling through endless emails, simply ask Ultra what you're looking for, and it will provide you with the relevant information. Need to find a specific attachment? Want to know the status of a project? Just have a natural conversation with Ultra, and it will retrieve the necessary details, saving you time and energy.
AI-Shortened Summaries for Effortless Skimming
Long emails can be overwhelming, especially when you're in a hurry. Ultra's AI-shortened summaries come to the rescue by providing condensed versions of your emails. These summaries allow you to skim through the content at a glance, quickly identifying key points and crucial information. No more wasting time reading lengthy emails from start to finish. With Ultra, you can cut through the noise and focus on what matters most, maximizing your productivity.
Try Ultra for Free Today!
Ready to revolutionize your email experience? Try Ultra for free today by simply logging in with your Google account. Within minutes, you'll unlock the full potential of AI-driven email management. Say goodbye to missed emails, disorganized inboxes, and wasted time. Let Ultra take care of it all, so you can focus on what truly matters. Start your Ultra journey now and save time while never missing another important email again.
Related Reading
• Gmail Spam Filter Not Working
• Free Email Spam Filter For Android
• Email Spam Filter Service
Are you tired of sorting through a cluttered mailbox with multiple email addresses? Do you find yourself missing important messages because they get lost in the chaos? Well, fret no more! In this blog post, we will explore the wonders of using a Gmail filter for multiple email addresses, a game-changing solution that will revolutionize the way you manage your inbox.
Imagine a world where all your emails are neatly organized and easily accessible. With a Gmail filter for multiple email addresses, this dream can become a reality. Whether you have a personal email, a work email, or multiple business accounts, this powerful tool allows you to streamline your inbox and stay on top of your messages. Say goodbye to the frustration of searching through a sea of emails and hello to a more organized and efficient email experience.
We will guide you through the process of setting up a Gmail filter for multiple email addresses, step by step. We will also share some expert tips and tricks to maximize the effectiveness of your filters. So if you're ready to take control of your inbox and reclaim your sanity, keep reading. By the end of this post, you'll be a Gmail filter pro, wondering how you ever lived without it. Plus, we'll answer a burning question you may have: "How do I empty my mailbox?" Let's dive in!
Table of Contents
Complete Step-by-Step Guide On How To Use Ultra's AI Email Filtering Feature
Take Control of Your Email Inbox With Ultra — Get To Inbox Zero Daily
Does Gmail Filter Multiple Email Addresses At Once?
Managing multiple email addresses can be a challenging task. Fortunately, Gmail offers a robust email filtering system that can help streamline your inbox and keep you organized. We will explore whether Gmail can filter multiple email addresses at once and how to leverage this powerful feature to enhance your email management.
Yes, Gmail has the capability to filter multiple email addresses at once using its advanced filtering options. With Gmail filters, you can apply specific actions to incoming emails based on various criteria, including sender email addresses. This means you can create filters that will automatically sort and organize emails from multiple email addresses into separate folders, apply labels, mark as important, or even forward to another account.
Creating Gmail Filters for Multiple Email Addresses
To create a filter for multiple email addresses, follow these simple steps:
Open Gmail and click on the gear icon in the top right corner to access the settings menu.
Select "See all settings" from the drop-down menu.
Go to the "Filters and Blocked Addresses" tab.
Click on the "Create a new filter" button.
In the "From" field, enter the email addresses you want to filter, separated by commas.
Customize the filter criteria as per your preference, such as specific words in the subject or body, and choose the desired actions to take when the filter matches.
Click on the "Create filter" button to save your filter.
Managing Multiple Email Addresses with Gmail Filters
Once you have created filters for multiple email addresses, Gmail will automatically apply them to incoming emails according to the specified criteria. Here are some practical ways you can leverage Gmail filters to manage multiple email addresses effectively:
1. Organize Emails
Create filters to sort emails from different email addresses into separate folders or labels. This ensures that each email address has its own dedicated space, allowing you to focus on relevant messages without getting overwhelmed.
2. Set Priorities
Use filters to mark emails from important email addresses as "important" or "priority" so that they stand out in your inbox. This helps you prioritize your attention and ensures that you don't miss any critical communications.
3. Categorize Correspondence
Create filters to automatically apply specific labels to emails from different email addresses. This categorization makes it easier to find and manage related emails, such as work-related correspondence, personal emails, or newsletters.
4. Forward Emails
If you prefer consolidating your emails into a single inbox, you can create filters to forward emails from multiple email addresses to a primary account. This eliminates the need to switch between multiple accounts and allows you to access all your emails in one place.
Gmail's email filtering system is a powerful tool that can greatly simplify the management of multiple email addresses. By creating filters for different email addresses, you can automate the organization, prioritization, and categorization of your incoming emails. Take advantage of this feature to streamline your email workflow and regain control over your inbox.
Related Reading
• Email Filters Gmail
• Spam Filter Iphone Email
• Gmail Date Filter
• Gmail Filter Syntax
• How To Remove Filter In Gmail
• Gmail Apply Filter Retroactively
How To Use Gmail Filter for Multiple Email Addresses
Gmail is an incredibly powerful and versatile email service, and one of its most useful features is the ability to create filters. Filters allow you to automatically organize and prioritize your incoming emails, ensuring that your inbox remains clutter-free and that you don't miss any important messages.
In this section, let’s through the process of using the Gmail filter to filter for multiple email addresses within one filter. I will provide a step-by-step example using random company domains to demonstrate how you can effectively manage emails from various sources.
Step 1: Open Gmail Settings
To begin, open your Gmail account and click on the gear icon in the top-right corner of the screen. From the dropdown menu, select "Settings."
Step 2: Navigate to the Filters and Blocked Addresses Tab
Once in the Settings menu, click on the "Filters and Blocked Addresses" tab. This is where you can create and manage your filters.
Step 3: Create a New Filter
To create a new filter, scroll down to the bottom of the page and click on the "Create a new filter" link.
Step 4: Specify the Email Addresses
In the "From" field, enter the email addresses that you want to filter. You can enter multiple email addresses by separating them with the "|" symbol. For example, if you want to filter emails from randomcompany1.com and randomcompany2.com, you would enter "randomcompany1.com|randomcompany2.com" in the "From" field.
Step 5: Define the Filter Criteria
Next, you need to define the criteria for the filter. You can choose to filter emails based on various factors such as the subject, keywords in the body, attachments, and more. For this example, let's say we want to filter emails from these domains into a specific label called "Random Companies".
In the "Has the words" field, enter any specific keywords or phrases that you want to filter. For instance, if you want to filter emails with the subject line containing the word "offer" or "opportunity", you would enter "offer|opportunity" in this field.
Step 6: Set the Action
Now it's time to set the action for the filter. You can choose to automatically apply a label, mark the email as important, prioritize it, or even forward it to another email address. In this section, we want to apply the label "Random Companies" to these emails. Select the checkbox next to "Apply the label" and choose "Random Companies" from the dropdown menu.
Step 7: Create the Filter
Finally, click on the "Create filter" button to save your filter. Gmail will now automatically filter any emails from the specified email addresses that match the defined criteria and apply the "Random Companies" label to them.
Step 8: Manage Your Filter
You can always go back and edit or delete your filter by accessing the "Filters and Blocked Addresses" tab in the Gmail Settings. This allows you to refine your filter settings or make changes as needed.
By following these steps, you can easily set up a Gmail filter to filter for multiple email addresses within one filter. This will help you stay organized and ensure that important emails from various sources are easily accessible and prioritized.
The power of Gmail filters lies in their flexibility and customizability. You can create filters based on various criteria, such as sender, subject, keywords, and more. Experiment with different filter settings to find what works best for you and streamline your email management process. Now that you have learned how to use the Gmail filter to filter for multiple email addresses, you can take control of your inbox and spend less time sorting through irrelevant emails.
Complete Step-by-Step Guide On How To Use Ultra's AI Email Filtering Feature
Watch this guide to learn how to use Ultra to empty your mailbox in minutes, today!
Chat with your email inbox like ChatGPT, get a daily to-do list based on your inbox, and much more.
Try Ultra for free today and discover a whole new way to manage your emails with AI. Save time, never miss important emails again, and unleash the full potential of your inbox with Ultra.
Related Reading
• Best Email Spam Filter
• How To Filter Unread Emails In Gmail
• Gmail Filter Move To Folder
• Gmail Filter Wildcard
• Gmail Filter Multiple Email Addresses
• Gmail Disable Spam Filter
• Gmail Filter Has The Words
• Gmail Filter Email To Folder
• Gmail Filter Subject Contains Words
• Gmail Filter Older Than
• Gmail Filter Regex
• Gmail Filter Delete After X Days
• Gmail Filter Multiple Senders
• Gmail Filter Calendar Invites
• Reset Gmail Spam Filter
• Gmail Create Filter To Forward Email
• Gmail Filter Apply Multiple Labels
• How To Filter Large Emails In Gmail
• Gmail Filter Not From Domain
How Do I Filter More Than 50 Emails In Gmail?
Managing a large number of emails can be overwhelming, especially when you have multiple email addresses. Thankfully, Gmail provides a powerful filtering feature that allows you to organize and prioritize your emails effectively. In this section, let’s walk you through the steps to filter more than 50 emails in Gmail, helping you optimize your email management and improve productivity.
Understanding Gmail Filters
Before we dive into the step-by-step process, let's first understand what Gmail filters are and how they work. Gmail filters are rules that you can set up to automatically manage incoming emails based on specific criteria. These criteria can include the sender, subject, keywords, attachments, and more. By creating filters, you can instruct Gmail to perform certain actions on your emails, such as labeling, archiving, marking as read, forwarding, and deleting.
Creating a Gmail Filter
To filter more than 50 emails in Gmail, follow these simple steps:
Open Gmail and log in to your account.
Click on the gear icon in the top right corner of the Gmail interface, then select "See all settings" from the dropdown menu.
Go to the "Filters and Blocked Addresses" tab.
Scroll down to the bottom of the page and click on the "Create a new filter" link.
Setting the Filter Criteria
Now that you're in the filter creation window, you need to define the criteria for your filter. Here's how:
Choose the criteria that match the emails you want to filter. You can select from various options like sender, subject, keywords, attachments, and more. For example, if you want to filter all emails from a particular sender, enter their email address in the "From" field.
To specify multiple email addresses, separate them with the OR operator. For instance, if you want to filter emails from two senders, enter their email addresses in the "From" field separated by OR, like this: sender1@gmail.com OR sender2@gmail.com.
Defining the Filter Action
Once you have set the criteria, it's time to define the action that Gmail should take on the filtered emails. Here's what you need to do:
After setting the criteria, click on the "Create filter" button.
Choose the action you want Gmail to perform on the filtered emails. This may include labeling, archiving, marking as read, forwarding, or deleting.
If you choose to apply a label, select an existing label or create a new one.
Click on the "Create filter" button to save your filter settings.
Managing Filtered Emails
Once you have created a filter, Gmail will automatically apply it to incoming emails that match the defined criteria. Here are a few tips to help you manage your filtered emails effectively:
Regularly check your labeled folders to stay organized and ensure you don't miss any important emails.
Review and modify your filters as needed to adapt to changing circumstances.
Use the search bar in Gmail to find specific filtered emails quickly.
If you no longer need a filter, you can delete it by going to the "Filters and Blocked Addresses" tab in Gmail settings.
By following these steps and implementing effective filters, you can efficiently manage more than 50 emails in Gmail. Take control of your inbox, stay organized, and boost your productivity with Gmail's powerful filtering capabilities.
Take Control of Your Email Inbox With Ultra — Get To Inbox Zero Daily
We are constantly bombarded with emails, making it challenging to stay organized and focused. Long email threads can hide important action items and information, while spam outreach emails flood our inboxes, wasting our valuable time. What if there was a way to transform your email experience, making it more efficient and productive? Ultra, the AI-powered solution designed to crush your inbox, find what you need, and help you do more in less time.
Auto-Generating AI Todo's for Ultimate Efficiency
One of the most exciting features of Ultra is its ability to auto-generate AI todo's based on your emails and calendar. Instead of manually sifting through your inbox and creating to-do lists, Ultra's AI takes care of it for you. By intelligently analyzing the content of your emails and your calendar events, Ultra identifies actionable tasks and creates a comprehensive to-do list. Now, you can effortlessly prioritize your day and stay on top of your commitments without the hassle of manual organization.
Chat with Your Inbox, Powered by AI
Imagine having an email assistant that feels like a seamless conversation. With Ultra, you can chat with your inbox as if it were ChatGPT, a cutting-edge AI-powered chatbot. Instead of scrolling through endless emails, simply ask Ultra what you're looking for, and it will provide you with the relevant information. Need to find a specific attachment? Want to know the status of a project? Just have a natural conversation with Ultra, and it will retrieve the necessary details, saving you time and energy.
AI-Shortened Summaries for Effortless Skimming
Long emails can be overwhelming, especially when you're in a hurry. Ultra's AI-shortened summaries come to the rescue by providing condensed versions of your emails. These summaries allow you to skim through the content at a glance, quickly identifying key points and crucial information. No more wasting time reading lengthy emails from start to finish. With Ultra, you can cut through the noise and focus on what matters most, maximizing your productivity.
Try Ultra for Free Today!
Ready to revolutionize your email experience? Try Ultra for free today by simply logging in with your Google account. Within minutes, you'll unlock the full potential of AI-driven email management. Say goodbye to missed emails, disorganized inboxes, and wasted time. Let Ultra take care of it all, so you can focus on what truly matters. Start your Ultra journey now and save time while never missing another important email again.
Related Reading
• Gmail Spam Filter Not Working
• Free Email Spam Filter For Android
• Email Spam Filter Service
Imagine a world without inboxes.