
Managing Email Overload
19 Most Effective Strategies On How To Organize Gmail (2024)
April 14th, 2024
Are you drowning in a sea of unread emails? Wondering how to clean your email effectively? Let me share the secret with you. Learn the best way for you to organize Gmail in a way that makes sense for your life. You can have the benefits of a well-organized email account without the hassle of constantly sorting through clutter. Let's get started!
Table of Contents
Complete Step-by-Step Guide On How To Use Ultra's AI Email Assistant To Organize Your Gmail
Take Control of Your Email Inbox With Ultra — Get To Inbox Zero Daily
What Does It Mean To Organize Your Gmail Inbox?

Emailing is still a popular means of communication, especially in the business world, where an estimated 306 billion emails are received and sent daily. On average, each person receives around 120 emails a day. The flood of emails can hinder productivity if you have to waste time sifting through them to determine which ones are most important and require an immediate response.
You can become much more productive by organizing your Gmail. There are several ways to do this.
Filtering your emails
One of the best ways to organize your Gmail is to filter your emails using various parameters. By creating filters for emails that meet certain criteria, you can ensure that only certain types of emails go to specific folders. This way, you can avoid being inundated with unimportant emails.
Creating labels
Creating labels and using them to categorize your emails can make a huge difference. By categorizing your emails, you can quickly see which emails are related to which and address them together. This means you won’t have to waste time looking for emails that you have sorted into different categories.
Customizing your inbox settings
You can also customize your inbox settings to change what emails you see first. By setting different filters for your emails, you can ensure that the most important emails appear at the top of your inbox. This way, you can address these emails first and then move on to the less important ones.
Archiving emails
Archiving emails that you don’t want to appear in your inbox is also a great way to stay organized. By archiving emails, you can ensure that they don’t clutter up your inbox and distract you from the emails that require immediate attention.
Unsubscribing or blocking unwanted email senders
Unsubscribing or blocking unwanted email senders can also make a big difference in how organized your Gmail is. By preventing unwanted emails from appearing in your inbox, you can free up more time to focus on the emails that require your immediate attention.
Related Reading
What Are The Benefits Of Organizing Your Gmail Inbox
Organizing your Gmail inbox can significantly enhance your productivity. When you take the time to prioritize and sort your emails, you eliminate the need to spend valuable time scanning through your inbox to identify the most important messages. This organization ensures that you can quickly identify the emails that are most critical to your work, allowing you to focus your attention on the tasks that matter the most.
In fact, every time you stop what you’re doing to check your email, it takes about 23 minutes to get your focus back. By organizing your emails, not only can you save time spent on going through your inbox but also increase your focus and energy.
Better Time Management with Gmail Automated Organization
Automated Gmail organization can also help you manage your time more efficiently. Without proper email management, you may find yourself spending a significant portion of your workday in your inbox. By automating the organization of your emails, you can find it easier to manage your time more effectively and prioritize tasks.
This allows you to focus on your work without getting sidetracked by email notifications or spending unnecessary time responding to less important emails. By saving time spent on browsing and replying to emails, you can manage your time more effectively and ensure that you tackle the most critical work tasks.
Timely Communication with Organized Gmail Inboxes
When your Gmail inbox is organized, you can identify important emails much faster. This enables you to respond promptly to your employer or address time-sensitive emails promptly. With a clutter-free inbox, you can quickly locate essential messages and reply to them in a timely manner, facilitating more effective communication and collaboration with your colleagues. By organizing your emails, you can improve the efficiency of your communication, ensuring that you respond promptly to essential messages and stay on top of your work responsibilities.
Enhanced Job Satisfaction Through Email Organization
An organized email inbox can lead to improved job satisfaction. By quickly identifying important work-related messages, you can focus on essential tasks and eliminate the stress associated with email overload and improper organization.
This can help you enjoy your work more and experience greater satisfaction in your job. By organizing your Gmail inbox, you can improve your work efficiency, reduce stress, and enhance your overall job satisfaction.
Free AI Email Assistant
Everyone is tired of missing important action items and info in long email threads, and getting their emails flooded with spam outreach emails. Imagine a world without inboxes. Email has never been better. Leverage AI to crush your inbox, find what you need, and do more faster. What if an AI took care of your inbox?
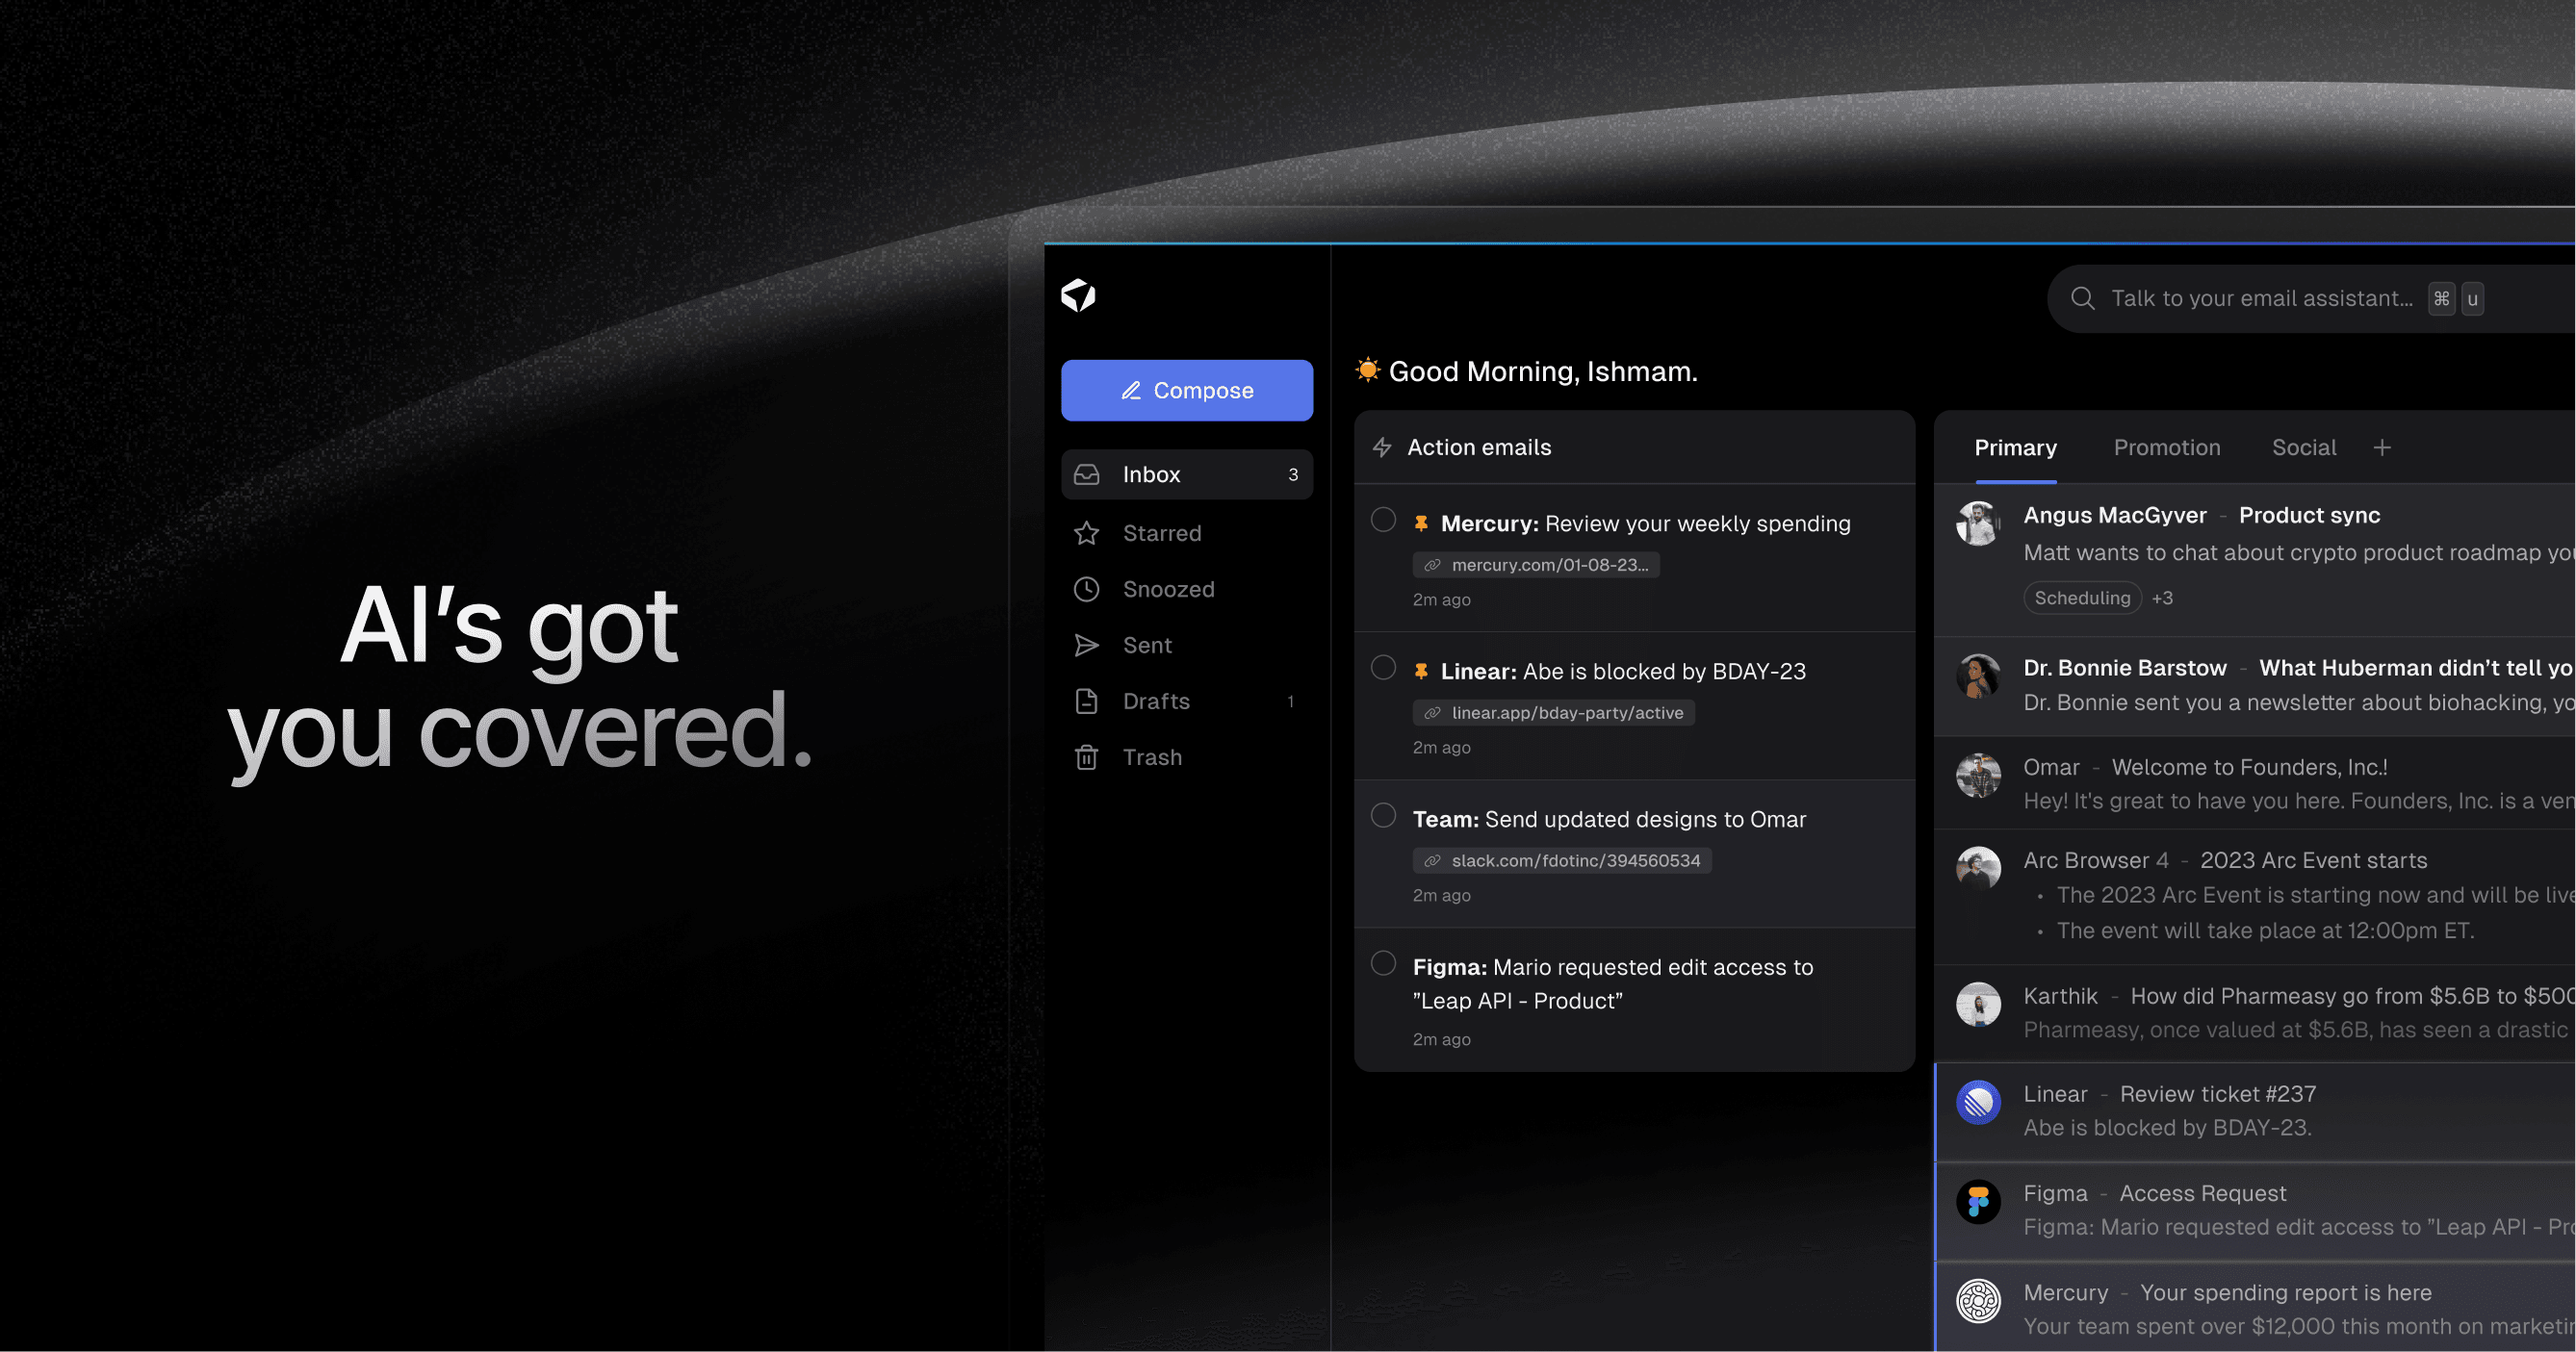
With Ultra you can get through your emails in minutes with AI. With Ultra, you can auto-generate AI todo's based on your emails and calendar, You can chat with your inbox like it's ChatGPT (email assistant), and you get AI-shortened summaries so you can skim through it at a glance.
Try Ultra’s free AI email assistant today—just login with Google and you’ll be set to go within minutes. Save time and never miss emails again with Ultra.
19 Effective Strategies On How To Organize Gmail
1. Select Your Layout to Organize Gmail
The first step to organizing your Gmail is to select your preferred inbox layout. When you open your inbox, click on the gear symbol in the upper right corner and select “Settings.” Then along the top of the settings window, click on the “Inbox” tab. From here, Gmail gives you five layout options for your inbox.
Default
This is the standard format that organizes your Gmail by date an email is received. In this view, you can select different categories in which your emails are placed. They appear as tabs at the top of your screen and can be helpful in determining which of your emails are likely to be more important.
Important First
In this view, Gmail tries to predict which emails you are most important (noted with a yellow marker) and displays those messages in a top inbox. Your less important messages are displayed in a lower inbox at the bottom of your screen.
Unread First
This view is similar to the Important First option, however, your top inbox includes messages you haven’t opened yet, while the bottom inbox would include everything else.
Starred First
Your Starred First view also splits your inbox into two fields and displays only the emails you’ve starred in the top view. Everything else appears in the second view below.
Priority Inbox
This is like a combination of all of the views. Gmail uses predictive analysis to determine which emails you’re most likely to interact with based on past actions. It then puts those emails into the top view.
Finding a layout that works for you will help you keep your Gmail organized.
2. Get rid of tabs you don’t use much
You don’t have to have all five tabs inside Gmail. You can disable the ones you do not use much. The only tab you cannot disable is the Primary tab.
Here’s what you have to do:
Click on Settings.
From the drop-down menu, click Configure Inbox.
Select the tabs you want to enable or disable.
Quick tip
If you disable a tab, its messages will appear in the Primary account. Permanently remove the ones that do not receive many emails.
3. Organize email in Gmail using labels
You’ve probably used folders to sort your computer files. Gmail labels work like folders, but they’re better. Why? You can use different labels for one email and easily find it under these different labels. The email isn’t duplicated for different labels, saving you storage space.
Here’s how to create a label in Gmail:
Open Gmail on your web browser.
Scroll down on the left panel until you reach the ‘Labels’ heading.
Click the ‘+’ icon.
Add your label name and click ‘Create’.
Once you’ve created a label, you can categorize emails under it. Here’s how:
First, open an email you want to label.
Click on the label icon.
Categorize this email under a pre-existing label or create a new label for this email.
4. Add a Preview Pane to Organize Gmail
The default view of Gmail just shows the sender, subject line, and a little bit of preview text before the row runs out of room. In most cases, you’ll need to open the email to determine if it was worth reading.
You can save time and organize your Gmail by adding a preview pane. Click on the gear symbol and “Settings” from the dropdown. Then select “Labs” from the tabs that appear. Scroll down to “Preview Pane” and click enable. Save your changes and then you’ll have the option to see a preview of each email that comes in.
5. Delete old attachments
Google users get 15GB of free space, which is shared between Gmail, Google Drive and Google+ photos. If you find yourself pushing the limit, deleting old emails with large attachments is an easy way to free up space.
To find these messages, go to the search box and click the downward-pointing arrow to perform an advanced search. To search for messages with an attachment, check the box that says "Has attachment" and hit search (you can also type "has:attachment" in the search box). To find emails that are larger than a certain size, regardless of attachment status, fill out the advanced search size parameters: under Size, choose "greater than," and enter in the size in bytes, kilobytes or megabytes and hit search.
6. Create nested labels
You can further organize your labels by creating nested labels, or sublabels. With sublabels, you can categorize messages with even more detail -- instead of simply labeling something "Work," for example, you can label it as "Work > Important Projects."
To create a sublabel, select a message and then click the Labels button. Click "Create new" and fill out your new sublabel's name. To nest the label, check the box marked "Nest label under," and choose a parent label from the drop-down menu.
7. Archive emails you do not need in the near future
A lot of times, we do not delete emails only because we might need them later. And then they keep piling up like there’s no tomorrow. To make this process even easier, use an online PDF maker that will allow you to save your email content as a PDF before archiving.
This will allow you to keep access to important information without cluttering up your inbox. Archiving does not delete your email but removes it from your inbox. They remain searchable too. Select an email and look for the file-like icon at the top. Click it to archive.
8. Set up desktop notifications for new emails
If you’re in a customer-facing role, we’re pretty confident you get a lot of emails every day. If you prefer real-time engagement, we strongly recommend setting up desktop notifications. This way, messages pop up in the top right of your screen every time you receive a new email.
To enable desktop notifications, here’s what you have to do:
Head to your settings (the gear icon at the top).
In the general settings menu, scroll to ‘Desktop Notifications’ and click on the radio buttons to enable them.
Quick tip
Sometimes, desktop notifications can become annoying and distracting. To avoid falling into this trap, turn on desktop notifications for emails only marked as “Important.”
9. Use Multiple Gmail Accounts
You can create as many Gmail accounts as you want and for free, so there’s absolutely no reason not to have multiple Gmail accounts to separate personal and work emails. Gmail even comes with an incredibly useful feature that gives you a unified inbox for managing multiple email accounts, called Multiple Inboxes.
To turn on Multiple Inboxes, go to the Advanced tab under Settings.
Click on Enable right next to Multiple Inboxes.
Click Save Changes and wait for Gmail to reload.
Go to the Multiple Inboxes tab under Settings to customize the Multiple Inboxes feature to show email sent to your other address.
10. Learn Gmail’s Keyboard Shortcuts
You can save a lot of time by navigating Gmail using keyboard shortcuts. Yes, it will take some time to memorize them, but you’ll thank yourself for making the effort once you discover just how easier it is to organize Gmail with keyboard shortcuts. Just keep in mind that keyboard shortcuts work differently on PC and Mac computers. On PCs, you'll use Ctrl instead of ⌘.
Here’s a short list of some of the most popular keyboard shortcuts:
Previous message in an open conversation: p
Next message in an open conversation: n
Send: ⌘/Ctrl + Enter
Bold: ⌘/Ctrl + b
Italics: ⌘/Ctrl + i
Underline: ⌘/Ctrl + u
Archive: e
Mute conversation: m
Report as spam: !
Delete: #
Reply: r
11. Use Dots in Your Gmail Address
You might have noticed that a misplaced dot in a Gmail email address doesn't cause the message to return to the sender undelivered. The reason why this happens is simple: dots don't matter in Gmail addresses.
From the point of view of Gmail, the following three email addresses are identical:
johndoe@gmail.com
john.doe@gmail.com
j.o.h.n.d.o.e@gmail.com
You can use this Gmail quirk to your advantage by giving different email addresses to different people. For example, you can use the cleanest version of your email address for work, a version with a dot between your first name and your last name for communicating with friends
Even though Gmail ignores dots in email addresses, it's aware of their presence, so you can create filters to automatically separate different versions of your email address when they arrive and assign them colorful labels.
To filter a specific version of your email address:
Click the Show search options (three lines) on the right of the Gmail search bar.
Enter the email address in the To field.
Click the Create filter button.
Choose what to do when a message that matches your filter arrives.
Click the Create filter button again.
Quick tip
You cannot place dots in the domain name, which is the part of your email address that comes after the @ symbol.
12. Explore Gmail Add-Ons and Extensions
Gmail has many useful email organization features, but there's still a lot that it can't do, and that's where Gmail add-ons and extensions come in. By installing the right Gmail add-ons and extensions, you can make Gmail even more powerful than it already is and organize your Gmail inbox in ways you never thought were possible before.
Here are three Gmail add-ons and extensions all users should know about:
Inbox Pause
This simple Gmail add-on allows you to pause your Gmail inbox until you're ready to receive more emails. It's perfect for those who often feel overwhelmed by the number of email messages they receive and would like to check email only a few times a day to boost productivity.
Checker Plus for Gmail
This Chrome extension lets you get instant notifications for multiple Gmail inboxes directly in your web browser. You can read or delete emails without opening Gmail, and the extension even has a built-in text-to-speech engine so you can listen to your emails and continue working on your task.
Auto Text Expander
Tired of typing the same phrases over and over again? Auto Text Expander can save you keystrokes by replacing shortcuts with phrases or entire sentences.
13. Add stars to important emails
Gmail allows you to add a star icon to flag important emails. While it automatically adds an “Importance Marker” (yellow arrow next to the star) to those it determines as important, you can manually add or delete stars. The more you manually add or delete stars, the better the Gmail algorithm becomes at detecting and flagging important messages.
Here's how to add stars to important emails:
Open your inbox or a conversation.
Click on the star icon next to the email you want to mark as important.
To see all your starred emails, click on “Starred” in the left panel of your inbox.
14. Hit the unsubscribe button
Promotional emails are annoying. Evaluate how relevant are your current newsletter subscriptions. The whole idea is to organize your inbox better. Part of the process is reducing the amount of email stored but also reduce the number of emails that will arrive in the future.
See what subscriptions aren’t providing anything useful and get rid of those.
A big chunk of a cluttered email inbox is made of subscriptions and newsletters we don’t even care. Sorting through these emails is time-consuming and will harm your productivity. There’s a considerable amount of tools you can use to unsubscribe from useless newsletters, which will save you a lot of time (and GBs) in your inbox, tools like Ultra.
15. Clean your Inbox consistently
To organize Gmail, you need to clean Gmail first. Something that you should keep in mind is, don’t be afraid to archive and delete old messages. The less you see, the better your productivity, so clean up those old messages. Basically, you should
Delete when you’re 100% sure that your conversation is finished and there’s no need to see it again
Archive when you might need this email in the future, but you’re done with it now.
16. Enable right-side chat
Right-side chat is another Gmail Labs feature, and it's an easy way to declutter your left column and maximize your screen real estate (especially if you have a wide screen).
To enable this, click the cog button, open the Settings menu and click the Labs tab. Under the Labs tab, find the feature called "Right-side chat," click "Enable" and then click "Save changes." Your chat list will move to the right side of the screen, opening up your left column for more labels and less clutter.
17. Turn on Nudges
Thanks to many spam emails, it is often straightforward to miss an important email on Gmail. The Nudge is an algorithm in Gmail that brings emails back to the top of your inbox when you or a recipient hasn’t sent a reply. It is excellent if you need constant reminders to send responses or follow-ups to important emails.
Nudges in Gmail are of two kinds:
Suggest emails to reply
Emails you might have forgotten to respond will appear at the top of your inbox.
Suggest emails to follow up on
Sent emails you might need to follow up on will appear at the top of your inbox
You can turn Nudges on/off under the “General” tab in your settings.
18. Mute Conversations
If you tired of getting stuck in email conversations between co-workers/customers that don’t necessarily involve you then the ‘Mute Conversations’ feature in Gmail is just for you. Mute a conversation in Gmail, and you won’t see any further messages related to it in your inbox. All emails added to the conversation after you’ve muted it will still be stored in your Gmail account but automatically archived. You’ll still be able to search for the discussion and view new messages.
To mute a conversation in Gmail, open the conversation and then click the “More” drop-down menu. Choose “Mute” from the list, and the dialogue is archived.
19. Reply to emails faster with Canned Responses
If you find yourself typing out the same email replies to multiple customers or co-workers, you should consider setting up Canned responses (templates).
Canned Responses are email templates that allow you to respond to emails with predetermined text. You can enable templates from the ‘Advanced’ tab in Gmail settings.
Related Reading
• How To Create Folders In Gmail
• How To Delete All Emails At Once
• Mass Unsubscribe Gmail
• How To Mass Unsubscribe From Emails
• Gmail Storage Full
• How To Move Emails To Folders In Gmail
• How To Clear Gmail Storage
• How To Automatically Move Emails To A Folder In Gmail
• How To Automatically Label Emails In Gmail
• How To Clean Up Gmail
• How To Auto Delete Emails In Gmail
• Email Overload
• How To Organize Gmail Into Folders
• How To Clear Your Email Inbox
• How To Organize Labels In Gmail
• Email Management Strategies
• Best Way To Organize Emails
• Outlook Auto Delete Emails
• How To Clean Out Email
• Gmail Search Syntax
• How To Delete Large Emails In Gmail
• How To Mark Email As Important In Gmail
• How To Use Labels In Gmail
Complete Step-by-Step Guide On How To Use Ultra's AI Email Assistant To Organize Your Gmail
Watch this guide to learn how to use Ultra to empty your mailbox in minutes, today!
Chat with your email inbox like ChatGPT, get a daily to-do list based on your inbox, and much more.
Try Ultra for free today and discover a whole new way to manage your emails with AI. Save time, never miss important emails again, and unleash the full potential of your inbox with Ultra.
Take Control of Your Email Inbox With Ultra — Get To Inbox Zero Daily
Imagine never having to worry about missing important emails or getting overwhelmed by a flood of spam messages. With Ultra, you can leverage the power of AI to revolutionize the way you interact with your inbox. By using cutting-edge technology, Ultra helps you quickly sort through your emails, find the information you need, and accomplish tasks at lightning speed.
AI Todo Generation: Let Ultra Boost Your Productivity
Ultra's AI-powered todo generation feature is a game-changer in email organization. By intelligently analyzing your emails and calendar events, Ultra can automatically generate to-do items based on the information it processes. This means you no longer have to spend valuable time manually converting emails into actionable tasks. With Ultra's AI todo generation, you can stay organized and on top of your priorities effortlessly.
Chat with Your Inbox: The Future of Email Communication
With Ultra, you can chat with your inbox just like you would with a human assistant. This innovative feature allows you to communicate with your email assistant in a conversational manner, making managing your inbox feel like a breeze. No more struggling to navigate complex email threads or deciphering cryptic messages. Ultra's chat functionality puts you in control of your email communication, allowing you to interact with your inbox like never before.
AI-Shortened Summaries: Skim Through Your Emails with Ease
Ultra's AI-shortened summaries feature is designed to help you quickly glean the most important information from your emails. Instead of sifting through long, tedious messages, Ultra condenses key points and highlights into concise summaries, allowing you to skim through your emails at a glance. By leveraging AI technology, Ultra streamlines your email reading process, making it easier for you to stay informed and make decisions quickly.
Try Ultra Today: Streamline Your Email Experience
Ready to revolutionize your inbox experience? Try Ultra's free AI email assistant today by simply logging in with your Google account. Within minutes, you'll be set up and ready to start enjoying the benefits of AI-powered email management. Say goodbye to email overwhelm and never miss another important message again.
Save time and boost your productivity with Ultra.
Related Reading
Unroll Me Alternative
Unlistr
Trimbox Free Alternative
Clean Email Alternative
Mailbird Alternative
Email Management Services
Mailstrom Review
Mailstrom Vs Clean Email
Best Email Cleaner
Are you drowning in a sea of unread emails? Wondering how to clean your email effectively? Let me share the secret with you. Learn the best way for you to organize Gmail in a way that makes sense for your life. You can have the benefits of a well-organized email account without the hassle of constantly sorting through clutter. Let's get started!
Table of Contents
Complete Step-by-Step Guide On How To Use Ultra's AI Email Assistant To Organize Your Gmail
Take Control of Your Email Inbox With Ultra — Get To Inbox Zero Daily
What Does It Mean To Organize Your Gmail Inbox?
Emailing is still a popular means of communication, especially in the business world, where an estimated 306 billion emails are received and sent daily. On average, each person receives around 120 emails a day. The flood of emails can hinder productivity if you have to waste time sifting through them to determine which ones are most important and require an immediate response.
You can become much more productive by organizing your Gmail. There are several ways to do this.
Filtering your emails
One of the best ways to organize your Gmail is to filter your emails using various parameters. By creating filters for emails that meet certain criteria, you can ensure that only certain types of emails go to specific folders. This way, you can avoid being inundated with unimportant emails.
Creating labels
Creating labels and using them to categorize your emails can make a huge difference. By categorizing your emails, you can quickly see which emails are related to which and address them together. This means you won’t have to waste time looking for emails that you have sorted into different categories.
Customizing your inbox settings
You can also customize your inbox settings to change what emails you see first. By setting different filters for your emails, you can ensure that the most important emails appear at the top of your inbox. This way, you can address these emails first and then move on to the less important ones.
Archiving emails
Archiving emails that you don’t want to appear in your inbox is also a great way to stay organized. By archiving emails, you can ensure that they don’t clutter up your inbox and distract you from the emails that require immediate attention.
Unsubscribing or blocking unwanted email senders
Unsubscribing or blocking unwanted email senders can also make a big difference in how organized your Gmail is. By preventing unwanted emails from appearing in your inbox, you can free up more time to focus on the emails that require your immediate attention.
Related Reading
What Are The Benefits Of Organizing Your Gmail Inbox
Organizing your Gmail inbox can significantly enhance your productivity. When you take the time to prioritize and sort your emails, you eliminate the need to spend valuable time scanning through your inbox to identify the most important messages. This organization ensures that you can quickly identify the emails that are most critical to your work, allowing you to focus your attention on the tasks that matter the most.
In fact, every time you stop what you’re doing to check your email, it takes about 23 minutes to get your focus back. By organizing your emails, not only can you save time spent on going through your inbox but also increase your focus and energy.
Better Time Management with Gmail Automated Organization
Automated Gmail organization can also help you manage your time more efficiently. Without proper email management, you may find yourself spending a significant portion of your workday in your inbox. By automating the organization of your emails, you can find it easier to manage your time more effectively and prioritize tasks.
This allows you to focus on your work without getting sidetracked by email notifications or spending unnecessary time responding to less important emails. By saving time spent on browsing and replying to emails, you can manage your time more effectively and ensure that you tackle the most critical work tasks.
Timely Communication with Organized Gmail Inboxes
When your Gmail inbox is organized, you can identify important emails much faster. This enables you to respond promptly to your employer or address time-sensitive emails promptly. With a clutter-free inbox, you can quickly locate essential messages and reply to them in a timely manner, facilitating more effective communication and collaboration with your colleagues. By organizing your emails, you can improve the efficiency of your communication, ensuring that you respond promptly to essential messages and stay on top of your work responsibilities.
Enhanced Job Satisfaction Through Email Organization
An organized email inbox can lead to improved job satisfaction. By quickly identifying important work-related messages, you can focus on essential tasks and eliminate the stress associated with email overload and improper organization.
This can help you enjoy your work more and experience greater satisfaction in your job. By organizing your Gmail inbox, you can improve your work efficiency, reduce stress, and enhance your overall job satisfaction.
Free AI Email Assistant
Everyone is tired of missing important action items and info in long email threads, and getting their emails flooded with spam outreach emails. Imagine a world without inboxes. Email has never been better. Leverage AI to crush your inbox, find what you need, and do more faster. What if an AI took care of your inbox?
With Ultra you can get through your emails in minutes with AI. With Ultra, you can auto-generate AI todo's based on your emails and calendar, You can chat with your inbox like it's ChatGPT (email assistant), and you get AI-shortened summaries so you can skim through it at a glance.
Try Ultra’s free AI email assistant today—just login with Google and you’ll be set to go within minutes. Save time and never miss emails again with Ultra.
19 Effective Strategies On How To Organize Gmail
1. Select Your Layout to Organize Gmail
The first step to organizing your Gmail is to select your preferred inbox layout. When you open your inbox, click on the gear symbol in the upper right corner and select “Settings.” Then along the top of the settings window, click on the “Inbox” tab. From here, Gmail gives you five layout options for your inbox.
Default
This is the standard format that organizes your Gmail by date an email is received. In this view, you can select different categories in which your emails are placed. They appear as tabs at the top of your screen and can be helpful in determining which of your emails are likely to be more important.
Important First
In this view, Gmail tries to predict which emails you are most important (noted with a yellow marker) and displays those messages in a top inbox. Your less important messages are displayed in a lower inbox at the bottom of your screen.
Unread First
This view is similar to the Important First option, however, your top inbox includes messages you haven’t opened yet, while the bottom inbox would include everything else.
Starred First
Your Starred First view also splits your inbox into two fields and displays only the emails you’ve starred in the top view. Everything else appears in the second view below.
Priority Inbox
This is like a combination of all of the views. Gmail uses predictive analysis to determine which emails you’re most likely to interact with based on past actions. It then puts those emails into the top view.
Finding a layout that works for you will help you keep your Gmail organized.
2. Get rid of tabs you don’t use much
You don’t have to have all five tabs inside Gmail. You can disable the ones you do not use much. The only tab you cannot disable is the Primary tab.
Here’s what you have to do:
Click on Settings.
From the drop-down menu, click Configure Inbox.
Select the tabs you want to enable or disable.
Quick tip
If you disable a tab, its messages will appear in the Primary account. Permanently remove the ones that do not receive many emails.
3. Organize email in Gmail using labels
You’ve probably used folders to sort your computer files. Gmail labels work like folders, but they’re better. Why? You can use different labels for one email and easily find it under these different labels. The email isn’t duplicated for different labels, saving you storage space.
Here’s how to create a label in Gmail:
Open Gmail on your web browser.
Scroll down on the left panel until you reach the ‘Labels’ heading.
Click the ‘+’ icon.
Add your label name and click ‘Create’.
Once you’ve created a label, you can categorize emails under it. Here’s how:
First, open an email you want to label.
Click on the label icon.
Categorize this email under a pre-existing label or create a new label for this email.
4. Add a Preview Pane to Organize Gmail
The default view of Gmail just shows the sender, subject line, and a little bit of preview text before the row runs out of room. In most cases, you’ll need to open the email to determine if it was worth reading.
You can save time and organize your Gmail by adding a preview pane. Click on the gear symbol and “Settings” from the dropdown. Then select “Labs” from the tabs that appear. Scroll down to “Preview Pane” and click enable. Save your changes and then you’ll have the option to see a preview of each email that comes in.
5. Delete old attachments
Google users get 15GB of free space, which is shared between Gmail, Google Drive and Google+ photos. If you find yourself pushing the limit, deleting old emails with large attachments is an easy way to free up space.
To find these messages, go to the search box and click the downward-pointing arrow to perform an advanced search. To search for messages with an attachment, check the box that says "Has attachment" and hit search (you can also type "has:attachment" in the search box). To find emails that are larger than a certain size, regardless of attachment status, fill out the advanced search size parameters: under Size, choose "greater than," and enter in the size in bytes, kilobytes or megabytes and hit search.
6. Create nested labels
You can further organize your labels by creating nested labels, or sublabels. With sublabels, you can categorize messages with even more detail -- instead of simply labeling something "Work," for example, you can label it as "Work > Important Projects."
To create a sublabel, select a message and then click the Labels button. Click "Create new" and fill out your new sublabel's name. To nest the label, check the box marked "Nest label under," and choose a parent label from the drop-down menu.
7. Archive emails you do not need in the near future
A lot of times, we do not delete emails only because we might need them later. And then they keep piling up like there’s no tomorrow. To make this process even easier, use an online PDF maker that will allow you to save your email content as a PDF before archiving.
This will allow you to keep access to important information without cluttering up your inbox. Archiving does not delete your email but removes it from your inbox. They remain searchable too. Select an email and look for the file-like icon at the top. Click it to archive.
8. Set up desktop notifications for new emails
If you’re in a customer-facing role, we’re pretty confident you get a lot of emails every day. If you prefer real-time engagement, we strongly recommend setting up desktop notifications. This way, messages pop up in the top right of your screen every time you receive a new email.
To enable desktop notifications, here’s what you have to do:
Head to your settings (the gear icon at the top).
In the general settings menu, scroll to ‘Desktop Notifications’ and click on the radio buttons to enable them.
Quick tip
Sometimes, desktop notifications can become annoying and distracting. To avoid falling into this trap, turn on desktop notifications for emails only marked as “Important.”
9. Use Multiple Gmail Accounts
You can create as many Gmail accounts as you want and for free, so there’s absolutely no reason not to have multiple Gmail accounts to separate personal and work emails. Gmail even comes with an incredibly useful feature that gives you a unified inbox for managing multiple email accounts, called Multiple Inboxes.
To turn on Multiple Inboxes, go to the Advanced tab under Settings.
Click on Enable right next to Multiple Inboxes.
Click Save Changes and wait for Gmail to reload.
Go to the Multiple Inboxes tab under Settings to customize the Multiple Inboxes feature to show email sent to your other address.
10. Learn Gmail’s Keyboard Shortcuts
You can save a lot of time by navigating Gmail using keyboard shortcuts. Yes, it will take some time to memorize them, but you’ll thank yourself for making the effort once you discover just how easier it is to organize Gmail with keyboard shortcuts. Just keep in mind that keyboard shortcuts work differently on PC and Mac computers. On PCs, you'll use Ctrl instead of ⌘.
Here’s a short list of some of the most popular keyboard shortcuts:
Previous message in an open conversation: p
Next message in an open conversation: n
Send: ⌘/Ctrl + Enter
Bold: ⌘/Ctrl + b
Italics: ⌘/Ctrl + i
Underline: ⌘/Ctrl + u
Archive: e
Mute conversation: m
Report as spam: !
Delete: #
Reply: r
11. Use Dots in Your Gmail Address
You might have noticed that a misplaced dot in a Gmail email address doesn't cause the message to return to the sender undelivered. The reason why this happens is simple: dots don't matter in Gmail addresses.
From the point of view of Gmail, the following three email addresses are identical:
johndoe@gmail.com
john.doe@gmail.com
j.o.h.n.d.o.e@gmail.com
You can use this Gmail quirk to your advantage by giving different email addresses to different people. For example, you can use the cleanest version of your email address for work, a version with a dot between your first name and your last name for communicating with friends
Even though Gmail ignores dots in email addresses, it's aware of their presence, so you can create filters to automatically separate different versions of your email address when they arrive and assign them colorful labels.
To filter a specific version of your email address:
Click the Show search options (three lines) on the right of the Gmail search bar.
Enter the email address in the To field.
Click the Create filter button.
Choose what to do when a message that matches your filter arrives.
Click the Create filter button again.
Quick tip
You cannot place dots in the domain name, which is the part of your email address that comes after the @ symbol.
12. Explore Gmail Add-Ons and Extensions
Gmail has many useful email organization features, but there's still a lot that it can't do, and that's where Gmail add-ons and extensions come in. By installing the right Gmail add-ons and extensions, you can make Gmail even more powerful than it already is and organize your Gmail inbox in ways you never thought were possible before.
Here are three Gmail add-ons and extensions all users should know about:
Inbox Pause
This simple Gmail add-on allows you to pause your Gmail inbox until you're ready to receive more emails. It's perfect for those who often feel overwhelmed by the number of email messages they receive and would like to check email only a few times a day to boost productivity.
Checker Plus for Gmail
This Chrome extension lets you get instant notifications for multiple Gmail inboxes directly in your web browser. You can read or delete emails without opening Gmail, and the extension even has a built-in text-to-speech engine so you can listen to your emails and continue working on your task.
Auto Text Expander
Tired of typing the same phrases over and over again? Auto Text Expander can save you keystrokes by replacing shortcuts with phrases or entire sentences.
13. Add stars to important emails
Gmail allows you to add a star icon to flag important emails. While it automatically adds an “Importance Marker” (yellow arrow next to the star) to those it determines as important, you can manually add or delete stars. The more you manually add or delete stars, the better the Gmail algorithm becomes at detecting and flagging important messages.
Here's how to add stars to important emails:
Open your inbox or a conversation.
Click on the star icon next to the email you want to mark as important.
To see all your starred emails, click on “Starred” in the left panel of your inbox.
14. Hit the unsubscribe button
Promotional emails are annoying. Evaluate how relevant are your current newsletter subscriptions. The whole idea is to organize your inbox better. Part of the process is reducing the amount of email stored but also reduce the number of emails that will arrive in the future.
See what subscriptions aren’t providing anything useful and get rid of those.
A big chunk of a cluttered email inbox is made of subscriptions and newsletters we don’t even care. Sorting through these emails is time-consuming and will harm your productivity. There’s a considerable amount of tools you can use to unsubscribe from useless newsletters, which will save you a lot of time (and GBs) in your inbox, tools like Ultra.
15. Clean your Inbox consistently
To organize Gmail, you need to clean Gmail first. Something that you should keep in mind is, don’t be afraid to archive and delete old messages. The less you see, the better your productivity, so clean up those old messages. Basically, you should
Delete when you’re 100% sure that your conversation is finished and there’s no need to see it again
Archive when you might need this email in the future, but you’re done with it now.
16. Enable right-side chat
Right-side chat is another Gmail Labs feature, and it's an easy way to declutter your left column and maximize your screen real estate (especially if you have a wide screen).
To enable this, click the cog button, open the Settings menu and click the Labs tab. Under the Labs tab, find the feature called "Right-side chat," click "Enable" and then click "Save changes." Your chat list will move to the right side of the screen, opening up your left column for more labels and less clutter.
17. Turn on Nudges
Thanks to many spam emails, it is often straightforward to miss an important email on Gmail. The Nudge is an algorithm in Gmail that brings emails back to the top of your inbox when you or a recipient hasn’t sent a reply. It is excellent if you need constant reminders to send responses or follow-ups to important emails.
Nudges in Gmail are of two kinds:
Suggest emails to reply
Emails you might have forgotten to respond will appear at the top of your inbox.
Suggest emails to follow up on
Sent emails you might need to follow up on will appear at the top of your inbox
You can turn Nudges on/off under the “General” tab in your settings.
18. Mute Conversations
If you tired of getting stuck in email conversations between co-workers/customers that don’t necessarily involve you then the ‘Mute Conversations’ feature in Gmail is just for you. Mute a conversation in Gmail, and you won’t see any further messages related to it in your inbox. All emails added to the conversation after you’ve muted it will still be stored in your Gmail account but automatically archived. You’ll still be able to search for the discussion and view new messages.
To mute a conversation in Gmail, open the conversation and then click the “More” drop-down menu. Choose “Mute” from the list, and the dialogue is archived.
19. Reply to emails faster with Canned Responses
If you find yourself typing out the same email replies to multiple customers or co-workers, you should consider setting up Canned responses (templates).
Canned Responses are email templates that allow you to respond to emails with predetermined text. You can enable templates from the ‘Advanced’ tab in Gmail settings.
Related Reading
• How To Create Folders In Gmail
• How To Delete All Emails At Once
• Mass Unsubscribe Gmail
• How To Mass Unsubscribe From Emails
• Gmail Storage Full
• How To Move Emails To Folders In Gmail
• How To Clear Gmail Storage
• How To Automatically Move Emails To A Folder In Gmail
• How To Automatically Label Emails In Gmail
• How To Clean Up Gmail
• How To Auto Delete Emails In Gmail
• Email Overload
• How To Organize Gmail Into Folders
• How To Clear Your Email Inbox
• How To Organize Labels In Gmail
• Email Management Strategies
• Best Way To Organize Emails
• Outlook Auto Delete Emails
• How To Clean Out Email
• Gmail Search Syntax
• How To Delete Large Emails In Gmail
• How To Mark Email As Important In Gmail
• How To Use Labels In Gmail
Complete Step-by-Step Guide On How To Use Ultra's AI Email Assistant To Organize Your Gmail
Watch this guide to learn how to use Ultra to empty your mailbox in minutes, today!
Chat with your email inbox like ChatGPT, get a daily to-do list based on your inbox, and much more.
Try Ultra for free today and discover a whole new way to manage your emails with AI. Save time, never miss important emails again, and unleash the full potential of your inbox with Ultra.
Take Control of Your Email Inbox With Ultra — Get To Inbox Zero Daily
Imagine never having to worry about missing important emails or getting overwhelmed by a flood of spam messages. With Ultra, you can leverage the power of AI to revolutionize the way you interact with your inbox. By using cutting-edge technology, Ultra helps you quickly sort through your emails, find the information you need, and accomplish tasks at lightning speed.
AI Todo Generation: Let Ultra Boost Your Productivity
Ultra's AI-powered todo generation feature is a game-changer in email organization. By intelligently analyzing your emails and calendar events, Ultra can automatically generate to-do items based on the information it processes. This means you no longer have to spend valuable time manually converting emails into actionable tasks. With Ultra's AI todo generation, you can stay organized and on top of your priorities effortlessly.
Chat with Your Inbox: The Future of Email Communication
With Ultra, you can chat with your inbox just like you would with a human assistant. This innovative feature allows you to communicate with your email assistant in a conversational manner, making managing your inbox feel like a breeze. No more struggling to navigate complex email threads or deciphering cryptic messages. Ultra's chat functionality puts you in control of your email communication, allowing you to interact with your inbox like never before.
AI-Shortened Summaries: Skim Through Your Emails with Ease
Ultra's AI-shortened summaries feature is designed to help you quickly glean the most important information from your emails. Instead of sifting through long, tedious messages, Ultra condenses key points and highlights into concise summaries, allowing you to skim through your emails at a glance. By leveraging AI technology, Ultra streamlines your email reading process, making it easier for you to stay informed and make decisions quickly.
Try Ultra Today: Streamline Your Email Experience
Ready to revolutionize your inbox experience? Try Ultra's free AI email assistant today by simply logging in with your Google account. Within minutes, you'll be set up and ready to start enjoying the benefits of AI-powered email management. Say goodbye to email overwhelm and never miss another important message again.
Save time and boost your productivity with Ultra.
Related Reading
Unroll Me Alternative
Unlistr
Trimbox Free Alternative
Clean Email Alternative
Mailbird Alternative
Email Management Services
Mailstrom Review
Mailstrom Vs Clean Email
Best Email Cleaner
Imagine a world without inboxes.